Peperomias are a delightful group of plants that have captured the hearts of many plant lovers, thanks to their diverse shapes, sizes, and colors. Whether you're a seasoned plant parent or just beginning your indoor gardening journey, Peperomias offer a perfect opportunity to expand your collection through propagation.
In this article, we'll walk through the process of propagating Peperomia in water. From gathering the right materials to understanding the finer details of this method, we've got you covered. So, pull up a chair, grab a cup of tea, and let's get started on growing your Peperomia family.
Why Propagate Peperomia in Water?
So, why should you consider propagating Peperomia in water? Well, there are a few good reasons to try this method. First, it's a straightforward and low-maintenance way to multiply your plants without the need for soil. Water propagation allows you to see the roots growing, giving you a little peek into the plant's development. This can be especially rewarding, as it gives you a visual cue that you're doing everything right.
Additionally, water propagation is generally cleaner than dealing with soil, making it an ideal indoor activity. Who doesn't love a tidy plant project? Plus, it offers the flexibility to easily spot any issues with the roots before transferring the plant to soil. This can help ensure a healthy transition when it's time to pot your new plant.
Lastly, propagating Peperomia in water can be a fun experiment for plant people who enjoy trying different methods of plant care. It provides an opportunity to learn and observe your plant's growth in a unique way.
Gathering Your Supplies
Before you jump into propagating, it's important to gather all the necessary materials. Think of it as setting the stage for a successful plant-growing experience. Here’s what you’ll need:
- Healthy Peperomia plant: Choose a plant with strong, healthy leaves and stems. This will give you the best chance of success.
- Sharp scissors or pruning shears: Clean and sharp tools are essential to make a clean cut without damaging the plant.
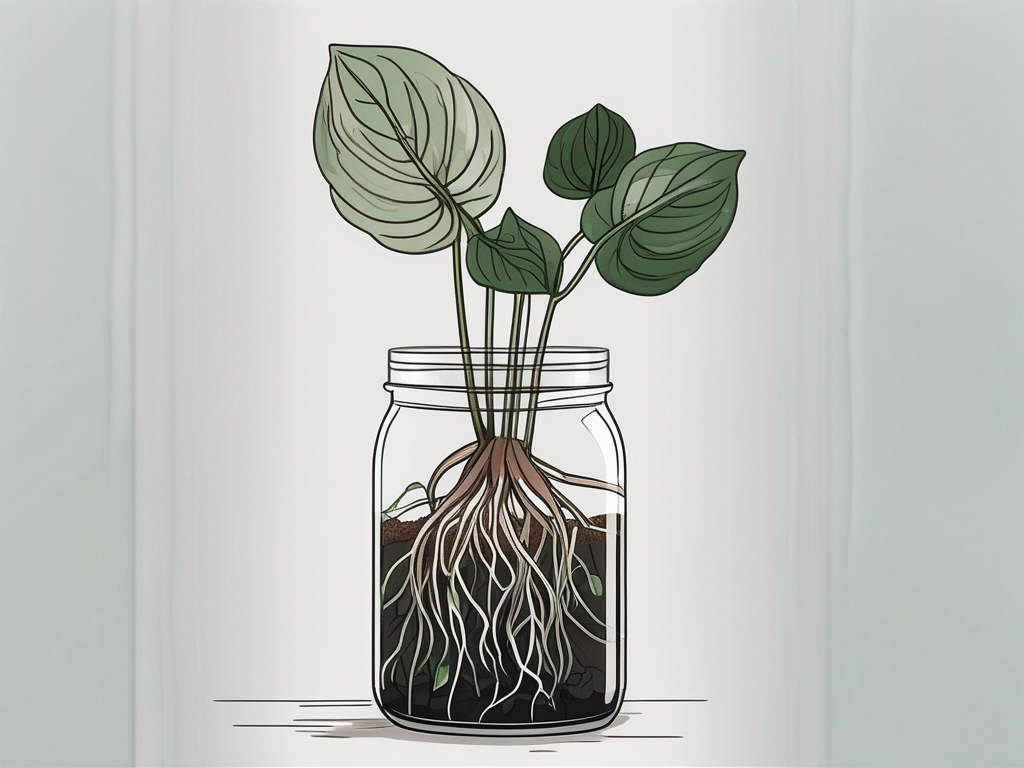
- Clear container or glass: A transparent container lets you watch the roots grow, which can be quite satisfying.
- Filtered or distilled water: Using clean water is crucial to prevent bacteria and algae growth.
- Optional: Rooting hormone: While not necessary, rooting hormone can speed up the rooting process.
Once you’ve gathered everything, you’re ready to start the propagation process. Remember, having the right tools makes the job much easier, so take a moment to ensure you’ve got everything you need.
Choosing the Right Cutting
Selecting the right cutting is a key step in successful propagation. You want to choose a healthy stem with a couple of leaves. Ideally, the cutting should be about three to four inches long. If you're unsure, aim for a piece that seems robust enough to support new growth.
When making the cut, be sure to use a clean, sharp pair of scissors or pruning shears. This helps prevent any damage to the plant and reduces the risk of introducing infections. Make your cut just below a leaf node, as this is where new roots will most likely form. If your Peperomia has longer stems, you might even be able to take multiple cuttings from the same plant.
It’s also a good idea to remove any leaves that might be submerged in water. Leaves left in water can rot, which isn't good for the plant. Plus, by removing these leaves, you encourage the plant to focus its energy on root development rather than leaf maintenance.
Preparing Your Container
Now that you have your cutting, it's time to prepare your container. Choose a clear glass or jar that’s large enough to hold your cutting without crowding it. A smaller container can help support the cutting and prevent it from falling over, while the transparency of the glass allows you to monitor root growth.
Fill the container with filtered or distilled water, leaving enough space at the top so the cutting can stand comfortably. Avoid using tap water if possible, as it often contains chemicals like chlorine that can harm sensitive cuttings. If you must use tap water, let it sit out for 24 hours to allow chlorine to evaporate.
Some plant lovers like to add a few drops of liquid fertilizer to the water, though this is optional. If you choose to do this, ensure it's a weak solution to avoid overwhelming the cutting. Finally, if you're using rooting hormone, dip the cut end of your stem into the powder before placing it in the water.
Placing the Cutting in Water
With your container ready, gently place the cutting into the water, ensuring that the cut end is submerged while the leaves are above the waterline. This setup helps the cutting focus on growing roots rather than leaves, which is exactly what you want at this stage.
Position the container in a spot with bright, indirect light. Direct sunlight can be too intense and may cause the water to heat up, potentially harming the cutting. A windowsill with filtered light or a spot a few feet away from a sunny window works well. Remember, Peperomias thrive in indirect light, so mimic their natural environment as much as possible.
It's also a good idea to change the water every week or so to keep it fresh and avoid any growth of bacteria or algae. Keep an eye on the water level to ensure it doesn't dip below the cut end of the stem. Consistent monitoring and care will set you on the path to successful propagation.
Monitoring and Caring for Your Cutting
As you place your cutting in its new watery home, patience becomes your best friend. Root development can take anywhere from a couple of weeks to a month, depending on various factors like light, temperature, and the specific Peperomia variety. Don't worry if you don't see immediate changes; growth takes time.
During this waiting period, maintain regular checks on your cutting. Look for changes in the leaves or any root development. If you notice the leaves turning yellow or wilting, it may indicate too much water or inadequate light. Adjust as needed by moving the container to a brighter spot or refreshing the water.
It's also wise to watch for any signs of mold or slime in the water. If you spot either, change the water immediately and clean the container thoroughly before refilling. This ensures a healthy environment for your cutting.
As the roots begin to form, you'll notice them appearing like fine white hairs. Let them grow until they're about one to two inches long before considering a transfer to soil. This length provides a strong foundation for the plant to adapt to its new home in the soil.
Transferring to Soil
Once your cutting has developed a healthy root system, it's time to transfer it to soil. This step is crucial, as it supports the plant's long-term health and growth. Choose a well-draining potting mix, as Peperomias prefer a light, airy soil.
Prepare a small pot with drainage holes to ensure excess water can escape, preventing root rot. Fill it with your chosen potting mix, leaving enough room to accommodate the root ball of your cutting. Create a small hole in the center of the soil where the roots will sit comfortably.
Gently remove the cutting from the water, taking care not to damage the delicate roots. Place it in the hole you've prepared and cover the roots with soil, patting it down lightly to secure the plant. Water the newly potted plant thoroughly, ensuring the soil is evenly moist.
Position your potted Peperomia in a spot with bright, indirect light, just as you did during the water propagation stage. Keep an eye on the soil moisture, watering when the top inch feels dry. Over time, your Peperomia will establish itself in its new environment, ready to grow and thrive.
Troubleshooting Common Issues
While propagating Peperomia in water is generally straightforward, you might encounter a few hiccups along the way. Here are some common issues and how to address them:
- Yellowing Leaves: This can be a sign of overwatering or inadequate light. Ensure the cutting isn't submerged too deeply and adjust its light exposure.
- Slime or Mold in Water: Change the water regularly and keep the container clean. This prevents unwanted growths that can harm your cutting.
- Slow Root Growth: Patience is key, but if you suspect slow growth, consider moving the cutting to a slightly warmer spot to encourage root development.
- Wilting Leaves: This might indicate underwatering or root issues. Check the water level and root health, making adjustments as necessary.
By staying attentive and responsive to these potential issues, you'll increase your chances of a successful propagation experience. Remember, every cutting is unique, and what works for one might not work for another, so be open to experimenting and learning.
Enjoying Your New Peperomia Plant
Congratulations! You've successfully propagated a Peperomia in water, and now you have a new plant to enjoy and care for. As your Peperomia grows, you can continue to propagate and expand your collection or share plants with friends and family.
Caring for your new Peperomia is similar to caring for the parent plant. Ensure it receives bright, indirect light and water it when the soil feels dry to the touch. Peperomias are relatively low-maintenance, making them perfect for plant parents of all experience levels.
And don't forget, your Peperomia can also act as a stylish decor piece in your home. Their unique leaves and compact size make them versatile enough to fit into any room, offering a touch of greenery to brighten up your space.
Final Thoughts
Propagating Peperomia in water is a rewarding and educational experience that allows you to grow your plant family with ease. By following these steps and being attentive to your plant's needs, you'll be well on your way to enjoying a thriving Peperomia collection.
At Cafe Planta, we're passionate about helping you succeed in your plant journey. Whether you're looking for new houseplants or need advice on care, we're here to support you. Feel free to reach out to us via email or connect with us on Instagram. Together, let's nurture a love for plants and create beautiful, green spaces in our lives.