Have you ever looked at your Cordyline plant and thought, "I wish I had more of these vibrant beauties around my home"? Well, you're in luck! Propagating Cordyline is not only a great way to multiply your plant collection, but it's also a fun and rewarding project. Whether you're a seasoned plant lover or just starting your green journey, propagating Cordyline can be a satisfying endeavor.
In this guide, we’ll walk through the step-by-step process of propagating Cordyline, covering everything from selecting the right plant to rooting your new cuttings. We'll also sprinkle in some tips and tricks to keep your Cordyline thriving. So grab your gardening gloves, and let’s get started!
Selecting the Right Cordyline for Propagation
Before you start snipping away, it's important to choose a healthy Cordyline plant for propagation. Picking the right candidate can make a world of difference in the success of your new plant babies. So, how do you know which plant to choose?
First, take a close look at your Cordyline's overall health. You want to select a plant that has vibrant, rich-colored leaves and no signs of disease or pest infestation. A plant that's already struggling with health issues is less likely to produce strong, viable cuttings.
Next, consider the maturity of your plant. Mature Cordylines, which have a well-established root system and several strong stems, are typically the best candidates for propagation. They can handle the stress of having cuttings taken without experiencing significant setbacks in growth.
Once you’ve identified a healthy, mature Cordyline, you’re ready to move on to the next step: choosing the right time to propagate. Timing can be crucial, so let’s explore that a bit more.
Timing Your Propagation Efforts
Timing can play a crucial role in the success of your propagation efforts. While it's possible to propagate Cordyline at different times of the year, there are certain periods when your chances of success are higher.
Spring is generally the best season for propagation. During this time, plants are coming out of their winter dormancy and entering a period of active growth. This means your Cordyline will have more energy to devote to developing new roots and leaves. Additionally, the warmer temperatures and increased sunlight typical of spring can help support the growth of new cuttings.
That said, if you're feeling adventurous, you can also try propagating in early summer. Just be mindful of the heat, as high temperatures can sometimes stress the cuttings. Make sure to keep them in a shady spot and maintain consistent moisture levels.
If you're propagating indoors, you have a bit more flexibility in terms of timing. Indoor environments tend to be more stable, allowing you to control factors like temperature and humidity. However, sticking to the spring or early summer timeline is still a good idea.
Gathering Your Propagation Tools
Before you start the actual propagation process, it's important to have all your tools and materials ready. Having everything on hand will make the process smoother and more enjoyable. Here’s a list of what you’ll need:
- Sharp Pruning Shears: A clean, sharp pair of pruning shears will make clean cuts and reduce the risk of disease transmission.
- Rooting Hormone: While optional, rooting hormone can help encourage faster root growth in your cuttings.
- Small Pots or Containers: You'll need these to plant your cuttings. Make sure they have drainage holes.
- Potting Mix: A well-draining potting mix is essential. You can use a mix designed for houseplants or create your own blend of potting soil, perlite, and sand.
- Watering Can or Spray Bottle: Keeping your cuttings moist is key to successful propagation.
- Plastic Bags or a Propagation Dome: These can help maintain humidity around the cuttings, which is crucial for their development.
With your tools at the ready, you’re set to begin the exciting part—taking cuttings from your Cordyline!
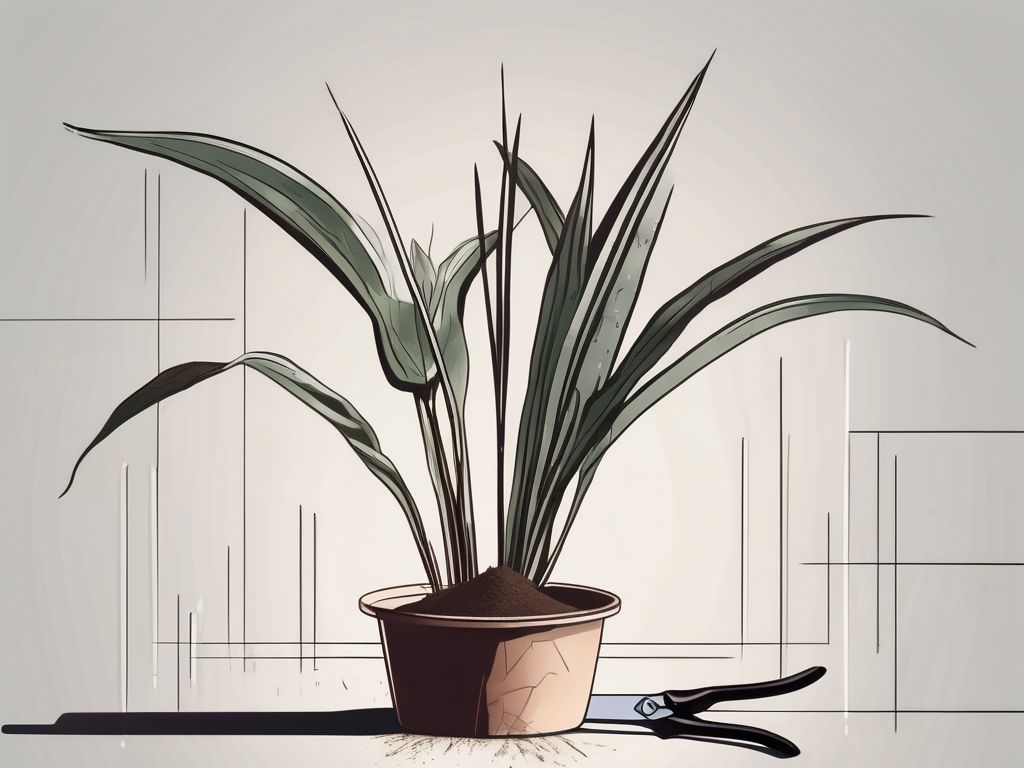
Taking Cuttings from Your Cordyline
Now that you have your tools and a healthy Cordyline plant, it's time to take some cuttings. This step is where the magic begins, as you're effectively creating the starting point for a whole new plant. Here’s how to do it:
Start by identifying a strong, healthy stem. You’ll want a stem that’s at least 6-8 inches long, with a few leaves at the top. Avoid using stems that are flowering, as these are often less successful in rooting.
Using your sharp pruning shears, make a clean cut just below a node (the point where a leaf joins the stem). Clean cuts heal better and reduce the risk of infection or disease.
Once you’ve taken your cutting, remove any leaves from the lower half of the stem. This part of the stem will be buried in soil, and removing the leaves helps prevent rot.
If you’re using rooting hormone, dip the cut end of your stem into the hormone powder. This step isn’t absolutely necessary, but it can speed up the rooting process.
With your cuttings prepared, you’re ready to plant them in their new temporary homes.
Planting and Caring for Your Cuttings
Now that you have your cuttings, the next step is to plant them in their pots. This part of the process is where your cuttings will begin to transform into new plants. Let’s take a closer look at how to do this successfully.
First, fill your pots or containers with a well-draining potting mix. You want the soil to be moist but not soggy—think of it as a well-wrung-out sponge. If you’re making your own mix, a combination of potting soil, perlite, and sand works great for Cordyline cuttings.
Using a pencil or your finger, make a hole in the soil that’s deep enough to accommodate the bottom half of your cutting. Gently place your cutting in the hole and firm the soil around it to hold it upright.
Water the cutting lightly to settle the soil and eliminate any air pockets. After watering, cover the pot with a plastic bag or place it under a propagation dome to maintain humidity. This moist environment is crucial for root development.
Place your potted cuttings in a warm, bright location, but out of direct sunlight. Direct sun can be too harsh and may scorch the cuttings. Indirect light is perfect for encouraging growth without overwhelming the baby plants.
Over the next few weeks, keep an eye on the moisture level of the soil. You want to keep it consistently damp, but not waterlogged. Check the soil every few days, and mist the cuttings with a spray bottle if they start to look dry.
Waiting and Watching for New Growth
After you’ve planted your cuttings, the next step is perhaps the hardest: waiting. This is where patience becomes your best friend because rooting can take some time. But don't worry, there are ways to tell if things are heading in the right direction.
Typically, you can expect to see new roots forming within 4 to 6 weeks. During this time, resist the urge to tug on your cuttings to check for root development. Disturbing them can damage delicate new roots.
Instead, watch for signs of new growth. New leaves or the unfurling of existing leaves can indicate that roots are developing beneath the soil. Another subtle sign of success is resistance when you gently nudge the cutting—this suggests that roots are anchoring the plant.
It’s worth noting that not every cutting will take root. If you notice any cuttings that are wilting, turning brown, or showing signs of rot, it’s best to remove them to prevent any potential spread of disease to other cuttings.
While waiting, continue to provide consistent care. Ensure your cuttings are in a warm spot with indirect light, and maintain soil moisture. With a bit of patience and care, you’ll soon have signs of new growth.
Transplanting Your Successfully Rooted Cuttings
Once your cuttings have developed a healthy root system and new growth is evident, it’s time to transplant them into larger pots. This step gives your Cordyline the space it needs to continue growing and thriving.
Start by choosing pots that are slightly larger than the current containers. Ensure these pots have drainage holes to prevent water from accumulating at the bottom, which can cause root rot.
Gently remove the cutting from its original pot, taking care not to damage the new roots. It can help to water the plant lightly before removal, as this loosens the soil and makes the plant easier to extract.
Place the cutting in its new pot, filling in around it with fresh potting mix. Firm the soil gently around the base of the plant to support it upright.
Water the newly potted Cordyline thoroughly to help settle the soil. After transplanting, place the plant back in a location with bright, indirect light. Continue to monitor the moisture level, watering as needed.
Congratulations! You’ve successfully propagated Cordyline and given your new plant a loving home. But the journey doesn’t end here. Let’s look at how to provide ongoing care for your Cordyline to keep it healthy and vibrant.
Ongoing Care for Your New Cordyline Plants
With your new Cordyline plants happily potted, you'll want to ensure they continue to thrive with proper care. While Cordyline is relatively low-maintenance, consistent attention will keep them looking their best.
Watering is one of the most important aspects of care. Cordyline prefers evenly moist soil, so aim to water when the top inch of soil feels dry to the touch. Be careful not to overwater, as this can lead to root rot.
Light is another key factor. While Cordyline enjoys bright, indirect light, it can also adapt to lower light conditions. However, too little light can cause the leaves to lose their vibrant color. If your plant starts to look a bit dull, try moving it to a brighter spot.
Fertilizing during the growing season (spring and summer) can help support robust growth. A balanced, water-soluble fertilizer applied every 4-6 weeks should do the trick. Be sure to follow the instructions on the fertilizer package to avoid over-fertilizing, which can harm the plant.
Finally, keep an eye out for pests such as spider mites and aphids. Regularly check the undersides of leaves and use insecticidal soap if you notice any unwelcome visitors. Maintaining a clean environment around your plants can also help prevent pest issues.
Common Challenges and How to Overcome Them
Even with the best care, you might encounter a few challenges along the way. Here are some common issues and tips on how to address them:
Leaf Browning: If you notice the tips of your Cordyline leaves turning brown, it could be due to fluoride in tap water or a lack of humidity. Switching to distilled water and misting the plant regularly can help.
Yellowing Leaves: Yellow leaves can be a sign of overwatering. Make sure your pot has good drainage, and allow the top inch of soil to dry out between waterings.
Pests: If you spot tiny insects or webs, act quickly. Wipe the leaves with a damp cloth and apply insecticidal soap. Regularly inspecting plants can prevent infestations.
Slow Growth: If your Cordyline isn’t growing much, it might need more light or nutrients. Try moving it to a brighter spot or consider fertilizing during the growing months.
Remember, every plant is unique, and sometimes it takes a bit of trial and error to find the perfect care routine. With patience and observation, you can troubleshoot most issues and keep your Cordyline thriving.
Final Thoughts
Propagating Cordyline can be a delightful and fulfilling journey, allowing you to expand your plant collection and share the joy of gardening with others. By following the steps outlined above, you can successfully grow new plants and enjoy the vibrant colors and textures that Cordyline adds to your home.
At Cafe Planta, we’re passionate about helping you care for your plants. Whether you’re looking for plant care accessories or you have questions about your plant babies, we’d love to hear from you. Feel free to email us or send us a message on Instagram. Our mission is to bring people and plants together, inspiring a deeper connection with nature. Let’s grow together!


