Have you ever found yourself captivated by the enchanting fragrance of Madagascar Jasmine, also known as Stephanotis floribunda? This beautiful, climbing plant with its waxy white blooms can add a touch of elegance to any home. The good news is, propagating Madagascar Jasmine is not only possible but also quite rewarding for plant lovers.
In this article, we'll walk you through the step-by-step process of propagating Madagascar Jasmine, from choosing the perfect stem cutting to nurturing your new plant. We'll also share some handy tips on plant care and maintenance to ensure your propagated jasmine thrives in your home.
Understanding Madagascar Jasmine
Before we embark on the propagation journey, let's take a moment to appreciate what makes Madagascar Jasmine so special. Native to Madagascar, this evergreen vine is renowned for its glossy, dark green leaves and clusters of star-shaped, fragrant flowers. It's a popular choice for weddings, often used in bridal bouquets and decorations, thanks to its sweet aroma and striking appearance.
Madagascar Jasmine thrives in warm, humid environments, making it a perfect indoor plant for those who can mimic its native conditions. It prefers bright, indirect light and well-draining soil. If you provide the right care, this plant can grow several feet long, making it ideal for training on trellises or in hanging baskets.
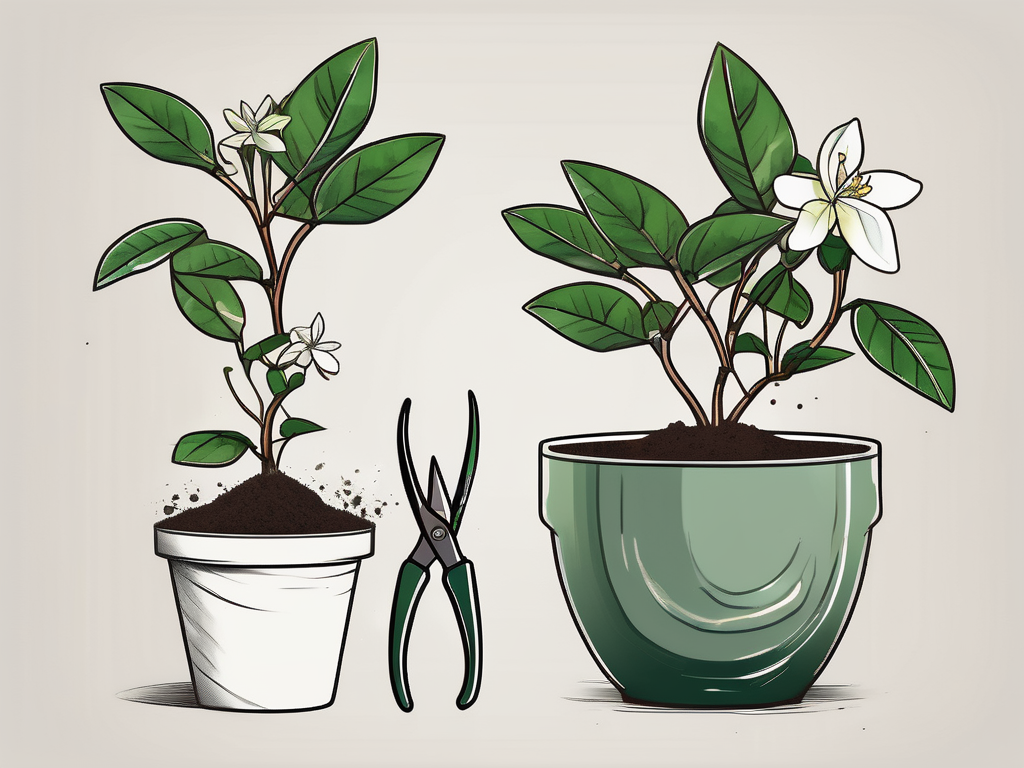
Gathering Your Supplies
Before you start propagating, you'll need to gather a few essential supplies. Here's a quick checklist to get you started:
- Healthy Madagascar Jasmine plant: Choose a parent plant that's disease-free and thriving.
- Pruning shears: Sharp and clean shears will ensure a clean cut and reduce the risk of infection.
- Rooting hormone: Although optional, this can help stimulate root growth and improve your chances of success.
- Potting mix: A well-draining mix suited for tropical plants is ideal. Consider using a combination of peat, perlite, and vermiculite.
- Small pots or containers: These should have drainage holes to prevent waterlogging.
- Plastic bag or humidity dome: This will help maintain high humidity around the cutting.
Once you've gathered everything, it's time to move on to the next step: selecting the right cutting.
Choosing the Right Cutting
The success of your propagation efforts largely depends on selecting a healthy, viable cutting. Ideally, look for a non-flowering stem that's about 4 to 6 inches long. The cutting should have several leaves and at least one node, which is the point where leaves attach to the stem.
Here are a few tips to help you choose the best cutting:
- Avoid flowering stems: Flowering stems are more focused on producing blooms than roots, making them less suitable for propagation.
- Pick a healthy stem: Look for stems that are firm, green, and free from any signs of disease or pests.
- Consider the angle: Make your cut at a 45-degree angle to increase the surface area for rooting.
Once you've chosen your cutting, it's time to prepare it for planting.
Preparing the Cutting
Now that you have your cutting, it's important to prepare it properly to encourage healthy root growth. Follow these simple steps:
- Remove excess leaves: Strip away the leaves from the bottom third of the cutting, leaving a few leaves at the top. This reduces water loss and directs energy towards root development.
- Dip in rooting hormone: While optional, dipping the cut end in rooting hormone can boost root growth. Simply dip the cut end into the powder or gel, tapping off any excess.
- Prepare the potting mix: Moisten the potting mix slightly, ensuring it's damp but not soggy. Fill your container, leaving enough space to insert the cutting.
With your cutting prepared, you're ready to plant it in the potting mix.
Planting the Cutting
Planting your cutting correctly is crucial for successful propagation. Here's how to do it:
- Create a hole: Use a pencil or your finger to create a small hole in the potting mix. This prevents the rooting hormone from rubbing off when you insert the cutting.
- Insert the cutting: Place the cutting into the hole, ensuring at least one node is buried in the soil. Gently firm the soil around the cutting to provide stability.
- Water lightly: Give the soil a light watering to settle it around the cutting. Be careful not to overwater, as excess moisture can lead to rot.
With your cutting securely planted, it's time to create the right conditions for rooting.
Creating the Right Environment
Madagascar Jasmine cuttings thrive in warm, humid conditions. To mimic these conditions at home, consider the following steps:
- Cover with a plastic bag: Place a clear plastic bag over the pot to create a mini greenhouse effect. This traps moisture and maintains high humidity.
- Avoid direct sunlight: Position the pot in a spot with bright, indirect light. Direct sunlight can scorch the cutting and hinder root development.
- Monitor temperature: Aim for a temperature range of 70-75°F (21-24°C). If necessary, use a heat mat to maintain consistent warmth.
With these conditions in place, your cutting will have the best chance of developing strong roots.
Monitoring and Maintenance
As your cutting begins to take root, it's important to keep a close eye on its progress. Here are some tips for monitoring and maintaining your cutting:
- Check moisture levels: Keep the soil consistently moist but not waterlogged. Overwatering can lead to root rot, while underwatering can dry out the cutting.
- Inspect for growth: After a few weeks, gently tug on the cutting to check for resistance. This indicates root development.
- Remove the plastic cover: Once roots have formed and growth is evident, gradually acclimate the cutting to normal humidity levels by removing the plastic cover.
With patience and care, you'll soon have a healthy Madagascar Jasmine ready for potting.
Potting Your New Plant
Once your cutting has developed a robust root system, it's time to pot it up into a larger container. Follow these steps to ensure a smooth transition:
- Choose the right pot: Select a pot that's slightly larger than the current container, with drainage holes to prevent waterlogging.
- Use fresh potting mix: Fill the pot with a fresh, well-draining potting mix. This provides the nutrients your new plant needs to thrive.
- Transplant gently: Carefully remove the rooted cutting from its original container, being mindful not to damage the roots. Place it in the new pot and fill in with soil, firming it gently around the plant.
- Water thoroughly: Give the newly potted plant a thorough watering to help settle the soil and remove any air pockets.
Your Madagascar Jasmine is now ready to continue its growth journey in its new home.
Caring for Your Madagascar Jasmine
Now that you've successfully propagated and potted your Madagascar Jasmine, it's essential to provide the right care to keep it thriving. Here are some tips to help your plant flourish:
- Light: Ensure your plant receives bright, indirect light. Too much direct sun can scorch the leaves, while too little light can stunt growth.
- Watering: Water your plant when the top inch of soil feels dry. Madagascar Jasmine prefers consistent moisture but doesn't like to sit in soggy soil.
- Humidity: Maintain a humid environment, especially during the winter months. Consider using a humidifier or placing a tray of water near the plant.
- Fertilizing: Feed your plant with a balanced, water-soluble fertilizer every two to four weeks during the growing season.
With the right care, your Madagascar Jasmine will reward you with lush growth and fragrant blooms.
Dealing with Pests and Problems
Like any plant, Madagascar Jasmine can encounter pests and problems. Here's how to tackle some common issues:
- Aphids and mealybugs: These pests can infest your jasmine, causing damage to the leaves. Use insecticidal soap or neem oil to treat infestations.
- Yellowing leaves: If your plant's leaves turn yellow, it may be a sign of overwatering or poor drainage. Adjust your watering routine and ensure the pot has proper drainage.
- Leaf drop: Sudden leaf drop can occur due to environmental stress or changes in humidity. Ensure your plant is in a stable environment with consistent care.
By keeping a watchful eye on your plant's health, you can quickly address any issues that arise.
Incorporating Madagascar Jasmine into Your Home
Now that you have a thriving Madagascar Jasmine, consider how to incorporate it into your home's decor. This versatile plant can enhance any space with its beauty and fragrance. Here are some ideas:
- Use a trellis: Train your jasmine to climb a trellis, adding vertical interest to a room.
- Hanging baskets: Plant your jasmine in a hanging basket to enjoy its cascading growth.
- Bedroom decor: Place your jasmine in the bedroom for a touch of elegance and a hint of fragrance that can enhance relaxation.
With a bit of creativity, your Madagascar Jasmine can become a stunning focal point in your home.
Final Thoughts
Propagating Madagascar Jasmine can be a fun and fulfilling project for plant lovers. With the right techniques and a little patience, you'll soon have a beautiful new plant to add to your collection. From choosing the perfect cutting to caring for your new jasmine, each step of the process is an opportunity to connect with nature and enjoy the beauty of this delightful plant.
At Cafe Planta, we're passionate about helping you care for your plants and create a thriving indoor oasis. If you have any questions or need advice, don't hesitate to email us or reach out on Instagram. Whether you're an experienced plant parent or just starting your journey, we're here to support you every step of the way.


