Philodendron gloriosum, with its velvety heart-shaped leaves and striking veins, has captured the hearts of many plant lovers. If you're looking to share the beauty of this unique plant or simply want to expand your collection without breaking the bank, propagation is the way to go.
In this article, we'll guide you through the steps of propagating Philodendron gloriosum. From understanding the right conditions to the actual propagation process, you'll learn everything you need to know to successfully grow new plants from your existing ones.
Choosing the Right Time for Propagation
Timing is everything when it comes to propagation. For Philodendron gloriosum, the best time to propagate is during the growing season, which typically runs from spring to early summer. During this period, the plant is actively growing, making it more likely to root successfully.
Why is this timing important? Well, plants like to work with the seasons. Just like we might feel more energetic in spring, our plant friends use this time to push out new growth. The warmer temperatures and increased daylight provide the perfect environment for cuttings to root and grow.
- Spring to Early Summer: Optimal time for propagation due to active growth.
- Avoid Winter: Plants are usually dormant, making rooting more challenging.
Remember, while spring and early summer are ideal, you can still try propagation at other times. Just be prepared for a potentially slower rooting process, especially if you're attempting it in the cooler months.
Gathering Your Supplies
Before you jump into the propagation process, it's important to gather all the necessary supplies. Having everything on hand not only makes the process smoother but also increases your chances of success.
Here's what you'll need:
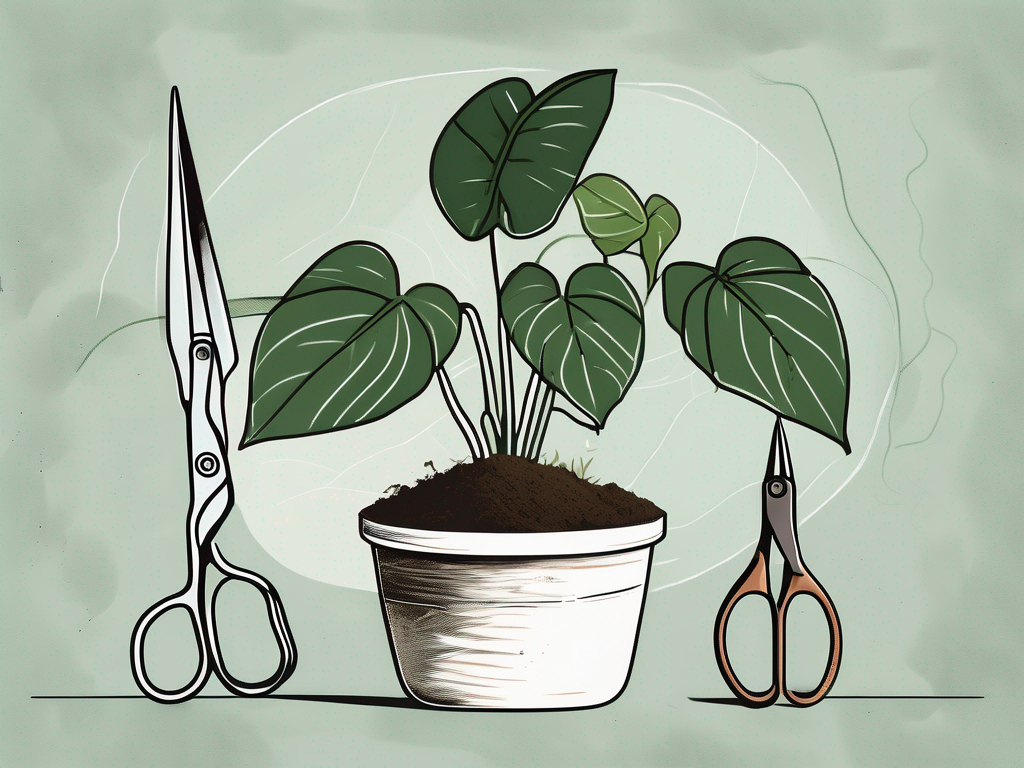
- Sharp, Clean Scissors or Pruning Shears: A clean cut minimizes damage to the plant and reduces the risk of infection.
- Rooting Hormone (Optional): This can help speed up the rooting process, but it's not absolutely necessary.
- Pots with Drainage Holes: Proper drainage is crucial to prevent root rot.
- Well-Draining Potting Mix: A mix that retains some moisture but doesn't stay soggy is ideal. You can use a mix designed for aroids or create your own with equal parts peat, perlite, and orchid bark.
- Plastic Wrap or a Clear Plastic Bag: These help maintain humidity around the cutting, mimicking a mini greenhouse effect.
- Watering Can or Spray Bottle: Keeping the soil lightly moist is important during the rooting stage.
Once you've gathered your supplies, you're ready to move on to the next step. Having everything prepared in advance will make the process more enjoyable and less stressful, allowing you to focus on ensuring your cuttings take root.
Identifying the Right Cutting
Not all parts of the plant are created equal when it comes to propagation. Identifying the right cutting is crucial for a successful propagation experience. You'll want to look for healthy segments of the plant that have at least one node, which is where the roots will develop.
Here's what to look for:
- Healthy Stem: Choose a segment that looks robust, free from any signs of disease or damage.
- Nodes: These are bumps on the stem where roots are likely to form. Aim for a cutting with at least one node, although two or more can increase your chances of success.
- Leaves: While not essential, having at least one leaf can help with photosynthesis as the cutting establishes roots.
Once you've found a suitable cutting, make sure your tools are clean to prevent any potential infection. A sharp pair of scissors or pruning shears will give you a clean cut, reducing damage to both the cutting and the parent plant.
Making the Cut
This step can feel a bit nerve-wracking for beginners, but don't worry—it's simpler than it seems. Making the right cut is essential for successful propagation, and with a little care, you'll be able to do it with confidence.
First, ensure your cutting tool is sharp and disinfected. You can clean it with rubbing alcohol or a solution of water and bleach. This step is crucial to prevent spreading any potential diseases.
Steps to Make the Cut:
- Locate the Node: Find the node on the stem, as this is where roots will develop.
- Position Your Shears: Place them just below the node. This ensures there's enough room for root development.
- Make a Clean Cut: With one swift motion, cut the stem. A clean cut is less stressful for the plant and more likely to root successfully.
After making the cut, you might notice some sap oozing from the parent plant. This is normal and usually stops after a short while. You can dab it gently with a paper towel if needed. Now, you're ready to move on to the next phase—rooting your cutting.
Preparing the Cutting for Rooting
With your cutting in hand, it's time to prepare it for rooting. This step involves a little patience and care to ensure the cutting is set up for success.
Some plant people like to dip the cut end in a rooting hormone. While it's optional, rooting hormone can encourage faster root development and increase your chances of success. If you choose to use it, simply dip the cut end into the powder or gel, tapping off any excess.
Preparing the Pot:
- Choose the Right Pot: Select a pot with drainage holes to prevent waterlogging.
- Fill with Potting Mix: Use a well-draining mix. You can use a store-bought aroid mix or mix your own using peat, perlite, and orchid bark.
Once your pot is ready, make a small hole in the center of the soil. This is where you'll place the cutting. Gently insert the cutting into the hole, making sure the node is buried beneath the soil. Press the soil lightly around the cutting to secure it in place.
Creating the Ideal Environment
Now that your cutting is potted, it’s essential to create an environment that encourages rooting. Philodendron gloriosum cuttings thrive in warm, humid conditions, so aim to replicate these conditions as closely as possible.
Key Factors to Consider:
- Humidity: High humidity levels are crucial. You can cover the pot with plastic wrap or place it inside a clear plastic bag to create a mini greenhouse.
- Temperature: Keep your cutting in a warm spot, ideally between 70-80°F (21-27°C).
- Light: Provide bright, indirect light. Direct sunlight can scorch the leaves, while too little light can slow down rooting.
Regularly check the soil to ensure it remains slightly moist, but not waterlogged. Overwatering is a common mistake and can lead to rot, so it's better to err on the side of caution.
Monitoring and Caring for the Cutting
The waiting game begins! Over the next few weeks, you'll want to keep a close eye on your cutting to ensure it's doing well. Patience is key here, as rooting can take several weeks.
What to Monitor:
- Soil Moisture: Keep the soil consistently moist but not soggy. Use a spray bottle to mist the soil surface if needed.
- Signs of Growth: Look for new leaves or roots emerging from the node. This indicates that your cutting is establishing itself.
- Health of the Cutting: Watch for any signs of wilting or discoloration, which could indicate issues with water or light.
If you notice any problems, adjust the conditions as needed. For instance, if the cutting looks wilted, it might need a bit more humidity or less direct light. Troubleshooting is part of the process, and small adjustments can make a big difference.
Transplanting the Rooted Cutting
Once your cutting has developed a healthy root system—usually after a few weeks to a couple of months—it's time to transplant it into a more permanent home. This step is exciting because it means your propagation efforts have paid off!
Before transplanting, ensure the new pot has drainage holes and is filled with a suitable potting mix. You'll want to give the plant plenty of room to grow, so choose a pot that's a bit larger than the root system.
Steps for Transplanting:
- Gently Remove the Cutting: Carefully take the rooted cutting out of its current pot. Be gentle to avoid damaging the delicate roots.
- Prepare the New Pot: Fill the new pot with fresh potting mix.
- Plant the Cutting: Place the cutting in the new pot, ensuring it's at the same depth as before. Add more soil around it and press gently to secure it.
Water the plant lightly to help settle the soil. Continue to provide the same care as before, maintaining proper light and humidity levels to encourage further growth.
Troubleshooting Common Issues
Even with the best intentions, things can sometimes go awry. Here are some common issues you might encounter during propagation and how to address them:
Common Problems and Solutions:
- Wilting Leaves: Often a sign of too much direct light or insufficient humidity. Try moving the plant to a shadier spot and increase humidity.
- Yellowing Leaves: This could indicate overwatering. Allow the soil to dry out slightly before watering again.
- No Root Development: If the cutting isn't developing roots, ensure it's receiving enough light and warmth. Using a rooting hormone might also help.
By keeping an eye out for these signs and making the necessary adjustments, you'll increase the chances of a successful propagation experience. Remember, every plant is unique, and it might take a little trial and error to get things just right.
Final Thoughts
Propagating Philodendron gloriosum is a rewarding way to grow your plant collection or share it with friends. By choosing the right time, preparing properly, and monitoring the process, you can successfully propagate and enjoy the beauty of this stunning plant.
At Cafe Planta, we're here to support your plant journey. If you have questions or need more tips, feel free to email us or reach out on Instagram. We love helping plant people create thriving indoor jungles and can't wait to see what you grow!


