Imagine stepping into your garden and being greeted by a vibrant array of bromeliads, their colorful rosettes and exotic appearance brightening the space. These unique plants, known for their striking foliage and bold blooms, are perfect for adding a touch of the tropics to any outdoor setting.
In this article, we'll explore everything you need to know to successfully grow bromeliads outdoors. From selecting the right varieties and understanding their light needs to mastering soil composition and dealing with common pests, we'll guide you through each step to ensure your bromeliads thrive.
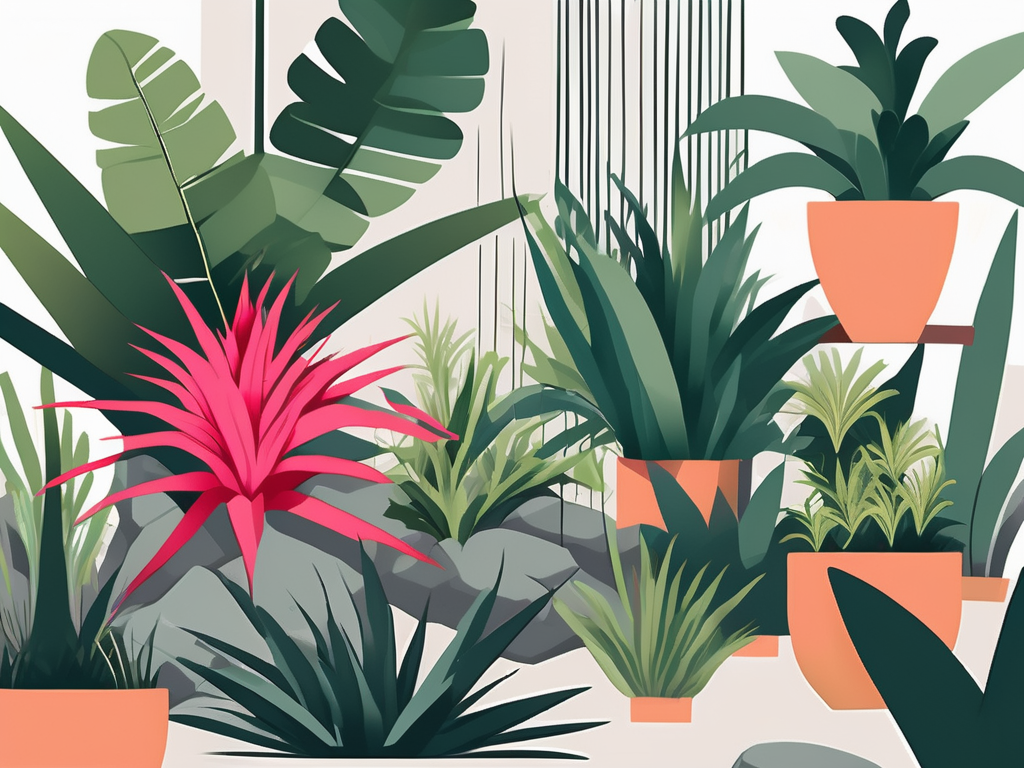
Choosing the Right Bromeliad Varieties
Bromeliads are a diverse group of plants, boasting over 3,000 species, each with unique characteristics. When choosing bromeliads for your garden, it's essential to consider your climate and the specific growing conditions you can provide. Some varieties are more suited to outdoor life than others, so let's dig into what makes each one special.
Start with the popular types like Aechmea, Guzmania, and Neoregelia. These varieties are known for their adaptability and vibrant colors, making them great choices for outdoor spaces. Aechmea plants, for instance, are hardy and can withstand a range of temperatures, while Guzmania are admired for their bright, showy flowers. Neoregelia are prized for their colorful foliage, which can add a splash of color even when not in bloom.
When selecting bromeliads, consider their mature size. Some can grow quite large and may not be suitable for small gardens. Additionally, think about how much sun your garden receives. Some bromeliads thrive in full sun, while others prefer partial shade. Matching the plant to your environment will set you up for success.
Understanding Light Requirements
Light is a crucial factor in growing healthy bromeliads. These plants can be a bit picky about their light conditions, but once you understand their needs, you'll find it's easy to keep them happy. Generally, bromeliads prefer bright, indirect light, but some varieties can handle direct sun with ease.
If you're planting in an area with intense sun, consider varieties like Aechmea blanchetiana that are more tolerant of direct sunlight. On the other hand, if your garden is mostly shaded, look for bromeliads like Guzmania, which thrive in lower light conditions.
One way to manage light exposure is to plant bromeliads under trees or near larger plants that can provide some natural shade. Remember to monitor the plants for signs of sunburn, such as browning or bleached leaves, and adjust their placement if needed. If you're unsure about the light conditions in your garden, try moving your bromeliads around until you find the spot where they seem happiest.
Perfecting the Soil Composition
Bromeliads aren't particularly fussy about soil, but they do have some preferences that can help them thrive. The right soil mix will support their unique water and nutrient needs, helping them grow strong and healthy.
A well-draining mix is essential, as bromeliads don't like to sit in waterlogged soil. You can create the perfect blend by mixing equal parts of orchid bark, perlite, and peat moss. This combination provides the right balance of drainage and moisture retention. If you're planting them directly in the ground, consider amending the soil with these materials to improve drainage.
Additionally, bromeliads are epiphytes, which means they naturally grow on other plants. While they can adapt to soil, they don't need heavy fertilization. A light feeding with a balanced, water-soluble fertilizer every few months is typically enough to keep them happy. Remember, less is more with bromeliads—over-fertilizing can lead to excessive leaf growth at the expense of blooms.
Watering Tips and Tricks
Watering bromeliads can be a bit different from traditional garden plants. These tropical beauties have unique structures, such as central cups or tanks, that help them capture and store water. Understanding how this works will make watering a breeze.
For most bromeliads, it's best to keep the central cup filled with water. This mimics their natural environment and provides the moisture they need. However, it's important to refresh this water regularly to prevent stagnation and potential rot. Simply tip the plant to empty the old water every week or so, then refill.
In terms of soil moisture, bromeliads prefer to be on the drier side. Water the soil sparingly, allowing it to dry out between waterings. Overwatering is a common mistake, so when in doubt, err on the side of caution. During rainy periods, you might not need to water them at all.
Temperature and Humidity Considerations
Bromeliads are native to tropical and subtropical regions, so they love warmth and humidity. However, this doesn't mean you can't grow them if you live in less-than-tropical areas. With a bit of care, you can create a microclimate that suits their needs.
These plants typically thrive in temperatures ranging from 60°F to 80°F. If your area experiences cooler temperatures, consider growing bromeliads in containers that can be moved indoors during cold snaps. Providing a sheltered location, such as a greenhouse or a covered patio, can also help protect them from the elements.
Humidity can be enhanced by misting the plants regularly or by placing them near a water feature. Grouping your bromeliads together can also create a pocket of humidity around them. Watch for signs of stress, like curling leaves, which may indicate they're too dry. Adjusting humidity levels can often resolve these issues.
Managing Pests and Diseases
Like all plants, bromeliads can occasionally fall victim to pests and diseases. The good news is that with a bit of vigilance and care, you can keep these issues in check. The most common pests are scale, mealybugs, and spider mites.
Regularly inspect your plants for any signs of trouble. Scale and mealybugs often appear as small, cottony spots, while spider mites create fine webs. If you notice any of these, start by washing the leaves with a gentle soap and water solution. For more persistent problems, you might need to use a neem oil spray or a horticultural soap.
Diseases are less common but can occur, particularly if plants are kept too wet. Root rot and leaf spots are the most frequent issues. Ensuring proper drainage and air circulation can prevent these problems. If you do spot any signs of disease, remove affected areas promptly and adjust your care routine to prevent recurrence.
Integrating Bromeliads into Your Garden Design
Bromeliads are not just plants; they're statement pieces that can bring a garden to life. Their unique shapes and colors make them perfect for adding interest and texture to your outdoor space. Here's how you can incorporate them into your garden design.
Consider using bromeliads as focal points in your garden. Their bold colors and architectural forms can draw the eye and create visual interest. Plant them in groups to create a striking display, or use them as accents among other foliage plants.
Another idea is to plant bromeliads in hanging baskets or attach them to trees, mimicking their natural growth habits. This can add a vertical element to your garden and make use of space that might otherwise go unused. Additionally, bromeliads can thrive in rock gardens, where their unique forms contrast beautifully with stones and gravel.
Propagation and Sharing Your Bromeliads
One of the joys of growing bromeliads is how easily they can be propagated. Once your plant has finished blooming, it will typically produce offshoots, known as "pups." These pups can be separated and planted on their own, allowing you to grow your collection or share with friends.
To propagate, wait until the pups are about one-third the size of the mother plant. Gently separate them by cutting with a sharp, clean knife. Allow the cut end to dry for a day or two, then plant them in a suitable soil mix. Keep the new plants in a warm, sheltered spot until they establish roots.
Sharing bromeliads is a wonderful way to connect with other plant lovers and spread joy. Whether you're gifting a pup to a friend or swapping varieties with fellow gardeners, propagation makes it easy to grow your community as well as your garden.
Creating a Bromeliad Maintenance Routine
Once your bromeliads are happily situated in your garden, keeping them healthy is all about establishing a consistent care routine. Regular maintenance will ensure they remain vibrant and beautiful throughout the seasons.
Start with a monthly check-up to assess their overall condition. Look for signs of pests or disease, and make any necessary adjustments to watering and light exposure. Refresh the water in their central cups regularly, and trim away any dead or damaged leaves to keep the plants looking tidy.
Fertilize sparingly, perhaps once every two to three months, to provide the nutrients they need without overwhelming them. Use a diluted, balanced fertilizer, and apply it directly to the soil rather than the central cup.
By being attentive to your bromeliads' needs and adjusting your care routine as necessary, you'll ensure that these stunning plants continue to thrive and add beauty to your garden year-round.
Final Thoughts
Growing bromeliads outdoors can transform your garden into a vibrant, tropical paradise. With the right selection of varieties, understanding of their light and water needs, and a bit of regular care, you'll find these plants both rewarding and captivating additions to your outdoor space.
At Cafe Planta, we love helping you find the perfect plants and accessories to enhance your garden. If you have any questions or just want to share your plant adventures, feel free to email us or send us a message on Instagram. Whether you're a seasoned plant parent or new to the joys of gardening, we're here to support your journey and help you create a beautiful, thriving space.


