Tradescantia, often known as the wandering jew or spiderwort, is a beloved houseplant for its trailing vines and vibrant foliage. If you've recently added one of these charming plants to your collection, or if yours is thriving and ready for a new pot, you're in for a treat. Repotting might seem like a daunting task, but with the right steps, it can be a straightforward and rewarding process.
In this article, we'll walk you through everything you need to know about repotting your Tradescantia. From when it's time to repot to the step-by-step process and how to care for your plant afterward, we've got you covered. Let's get started!
Recognizing When It's Time to Repot
Before you grab your potting soil and a new container, it's crucial to recognize when your Tradescantia needs repotting. While these plants aren't as fussy as some others, they do appreciate a little extra room to grow. Here are a few signs that it's time for a change:
- Roots Peeking Out: If you notice roots growing out of the drainage holes, it's a clear sign that your plant needs more space.
- Water Drains Too Quickly: If water seems to rush through the pot without soaking the soil, your plant might be root-bound, meaning the roots have taken up all available space.
- Stunted Growth: If your Tradescantia isn’t showing new growth during its active growing season, it might be due to cramped conditions.
- Yellowing Leaves: While this can be a sign of other issues, yellowing leaves combined with the above signs often indicate the need for repotting.
Recognizing these signs early can help keep your plant healthy and thriving. But when exactly should you repot? Ideally, during the spring or early summer when the plant is actively growing. This timing allows the plant to quickly establish itself in its new pot.
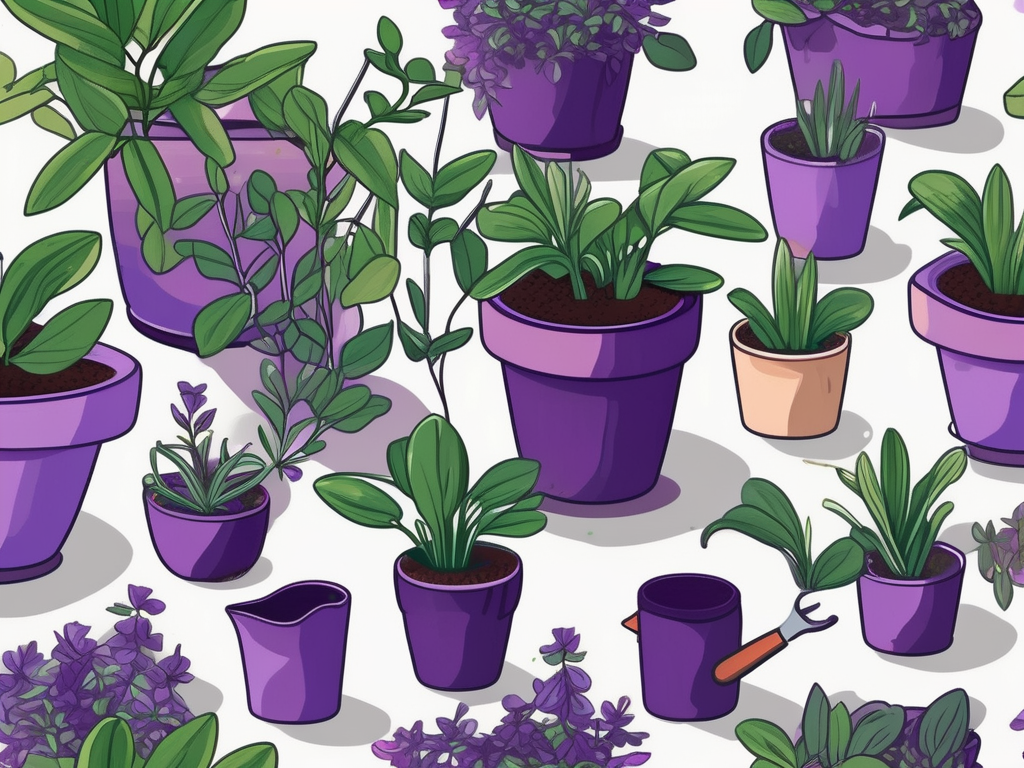
Choosing the Right Pot and Soil
Picking the right pot and soil is like choosing the perfect outfit for your Tradescantia—it needs to fit just right and be comfortable. Here's how to make the right choice:
Pots: Size and Material
- Size: Go for a pot that is one to two inches larger in diameter than the current one. This gives the roots room to expand without overwhelming the plant.
- Material: While Tradescantia can thrive in any pot material, terracotta is a popular choice due to its breathability. It helps manage moisture levels, which is crucial for preventing root rot.
- Drainage: Ensure the pot has good drainage holes. Tradescantia doesn’t like sitting in water, so proper drainage is essential.
Soil: The Right Mix
Tradescantia isn't too picky about soil, but it does appreciate one that drains well. You can buy a pre-made potting mix or make your own. Here's a simple recipe you can try:
- 2 parts regular potting soil
- 1 part perlite or pumice for aeration
- 1 part peat moss or coco coir for moisture retention
This mix offers a balance of moisture and drainage, keeping your Tradescantia's roots happy and healthy.
Prepping Your Tradescantia for Repotting
Preparation is key to a smooth repotting process. Before you start, make sure you have all your materials ready:
- A new pot with drainage holes
- Fresh potting mix
- Gardening gloves (optional but helpful)
- A small trowel or spoon
- Shears or scissors (for trimming any damaged roots)
Once you have your materials, it's time to prepare your plant. Water it a day before repotting. This step ensures the root ball is moist and easier to handle. Additionally, moist soil tends to hold together better, reducing the risk of root damage.
You might also want to gently loosen the soil around the pot's edges with a spoon or your fingers. This can make removing the plant from its current pot easier without damaging the roots.
The Repotting Process: Step-by-Step
Now comes the fun part—actually repotting your plant! Follow these steps to ensure you do it right:
- Remove the Plant: Gently turn the pot on its side and ease the plant out. If it's stuck, tap the pot's sides or use a spoon to loosen the soil further.
- Inspect the Roots: Once out, examine the roots for signs of rot or damage. Healthy roots are usually white or light brown. Use scissors to trim away any mushy or darkened roots.
- Position the Plant: Fill the new pot with a layer of fresh soil mix. Place the plant in the center and adjust its height so the top of the root ball sits about an inch below the pot's rim.
- Fill with Soil: Add soil around the root ball, gently pressing it down to remove air pockets. Make sure not to pack the soil too tightly, as this can hinder drainage.
- Water Thoroughly: After repotting, water the plant well. This helps settle the soil and ensures the roots have good contact with their new environment.
And voilà, your Tradescantia is now ready to thrive in its new pot! Just a few more steps, and you'll be well on your way to a healthy, happy plant.
Post-Repotting Care Tips
Now that your Tradescantia has a new home, it's essential to help it settle in. Here are some tips for post-repotting success:
- Location: Place your plant in a spot with bright, indirect light. Direct sunlight can scorch its leaves, while too little light might hinder growth.
- Watering: Avoid overwatering. Check the soil's top inch; if it's dry, it's time to water. Remember, Tradescantia is more forgiving of underwatering than overwatering.
- Humidity: These plants love humidity. If your home is dry, consider misting your plant or placing it near a humidity tray.
- Fertilizing: Wait a few weeks before fertilizing, as the fresh soil will have nutrients. When you're ready, use a balanced, water-soluble fertilizer every month during the growing season.
Remember, patience is key. Your plant might show some stress signs like wilting or yellowing leaves after repotting, but this is normal and should resolve once it acclimates to its new environment.
Common Mistakes to Avoid
Even seasoned plant lovers can make mistakes when repotting. Here are some common pitfalls and how to avoid them:
Overwatering
After repotting, it's tempting to douse your plant with water. However, Tradescantia is prone to root rot, so it's best to let the soil dry out a bit between waterings. Stick to the "finger test" to determine when your plant needs water.
Choosing the Wrong Pot Size
While it might seem like a bigger pot equals more room for growth, too large a pot can lead to waterlogged soil. Stick to one that’s just a couple of inches larger in diameter than the current pot.
Ignoring Pests
Repotting is an excellent time to check for unwanted visitors. Inspect the leaves and roots for signs of pests like spider mites or mealybugs. If you spot any, treat them before repotting to prevent an infestation in the new soil.
Benefits of Regular Repotting
Repotting isn’t just about giving your plant more room. It comes with several benefits that contribute to your Tradescantia's overall health:
- Fresh Nutrients: New soil provides fresh nutrients that the plant might have exhausted in its old pot.
- Improved Drainage: Over time, soil can become compacted, hindering water flow. New soil improves drainage, which is crucial for root health.
- Root Health: Repotting allows you to inspect and trim the roots, which can prevent diseases and encourage healthy growth.
- Growth Spurts: More room means your plant can grow larger and produce more vibrant foliage.
Think of repotting as a spa day for your plant—a little bit of effort that leads to a fresh start and more robust growth.
Creating a Beautiful Space with Tradescantia
Beyond its care requirements, Tradescantia is also a wonderful addition to your home decor. With its trailing vines and colorful leaves, it can spruce up any space. Here are some ideas to incorporate it into your interior design:
Hanging Planters
Tradescantia's trailing nature makes it perfect for hanging planters. Whether in the living room, kitchen, or bathroom, a hanging plant adds a touch of greenery without taking up floor space. Plus, it's a great way to draw the eye upwards, making a room feel larger.
Tabletop Displays
Use smaller pots for tabletop displays. Group them with other plants of varying heights for an engaging visual effect. Tradescantia pairs well with plants like ferns and pothos for a lush, layered look.
Color Coordination
With its variety of colors, Tradescantia can complement your home’s color scheme. For instance, the purple hues of Tradescantia pallida can pop against neutral tones, while the green and white stripes of Tradescantia fluminensis can add brightness to a darker room.
Remember, the key to incorporating plants into your decor is to have fun and let your personality shine through. Whether you're a minimalist or love a jungle vibe, there's a way to make Tradescantia work for you.
Understanding Tradescantia Varieties
Tradescantia is a diverse genus with several varieties to choose from. Each has its unique charm, making it easy to find one that suits your style. Here are a few popular ones:
- Tradescantia zebrina: Known for its striking purple and silver-striped leaves.
- Tradescantia fluminensis: Features small, green leaves with white stripes, perfect for adding a touch of brightness.
- Tradescantia pallida: Also called 'Purple Heart,' this variety boasts deep purple leaves that add a bold splash of color.
- Tradescantia spathacea: Known as 'Moses-in-the-Cradle,' it has green leaves with purple undersides, adding a surprise of color.
Each variety has slightly different care needs, so it's a good idea to research your specific plant. However, the repotting process remains largely the same.
Dealing with Common Pests and Problems
Tradescantia is relatively hardy, but like any plant, it can fall victim to pests and diseases. Here’s how to tackle some common issues:
Spider Mites
These tiny pests thrive in dry conditions and can cause yellowing and webbing on leaves. Increase humidity around your plant and regularly mist it to deter these mites. If they persist, use a neem oil spray for treatment.
Mealybugs
Mealybugs appear as white, cottony masses on the leaves and stems. You can remove them manually with a cotton swab dipped in alcohol. For larger infestations, consider using insecticidal soap.
Root Rot
This is often due to overwatering or poor drainage. Ensure your pot has drainage holes and that you’re using a well-draining soil mix. If you suspect root rot, repot your plant immediately, trimming away any affected roots.
Remember, healthy plants are less prone to pests and diseases. Regular care and attention go a long way in preventing these issues.
Final Thoughts
Repotting your Tradescantia is a rewarding experience that can breathe new life into your plant. By choosing the right pot and soil, recognizing when it's time to repot, and following the proper steps, you set your plant up for continued growth and vibrancy.
At Cafe Planta, we believe in the power of plants to bring joy and connection into our lives. Whether you're looking for new houseplants or advice on plant care, we're here to help. Feel free to reach out via email or find us on Instagram. We're excited to be part of your plant journey!


